Wednesday 23 December 2015

Crochet Bow Scarf

I keep seeing cute bow scarfs all over instagram, mostly knitted by @Bodkincreates' very talented Mum. I was casting about for a little extra something to make for my own Mum for Christmas and thought one of these would be perfect. But I wanted to crochet it - my knitty skills are a little rusty and I find crochet much quicker. 


I had a squizz at ravelry and although there are a few knitting patterns available, the perfect crochet pattern didn't exist so I made one up for myself. I thought you might like it too.


I used Drops Cloud in Bordeaux which is a chunky blown yarn which means it is very soft and light as a feather so you get a lot of length for your 50g. This scarf took about 2/3 of the ball. I worked back and forth with a 6mm hook throughout.

tr dec: Treble decrease - worked over two stitches.  yoh, insert hook into first st, yoh, pull through, yoh pull through 2 loops, yoh, insert hook into second st, yoh, pull through, yoh, pull though two loops, yoh, pull through all three loops.
dc dec: Double crochet decrease - worked over two stitches. insert hook into first st, pull through, insert hook into second st, pull though, yoh, pull through all three loops.
3tr cluster: Treble cluster over three stitches - work the first treble until there are two loops on the hook, then work each of the following two trebles to the same stage so there are four loops on the hook in total, yoh, pull through all four loops.


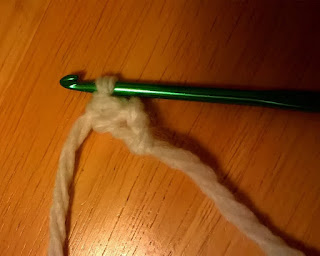
Foundation row) Ch 2

Row 1)  3 tr into 1st ch (3 stitches)

Row 2) Ch2, 2tr into first st, tr into next tr, 2tr into last tr (5 stitches)

Row 3) Ch2, 2tr in first st, 1tr in next 3 tr, 2tr into last tr (7)

Row 4) Ch2, 2tr in first st, 1tr in next 5 tr, 2tr into last tr (9)

Row 5) Ch2, 2tr in first st, 1tr in next 7 tr, 2tr into last tr (11)

Row 6) Ch2, tr dec in first 2tr, 1 tr in next 7 tr, tr dec into last 2 tr (9)

Row 7) Ch1,  dc dec four times, dc in last st (5)

Rows 8 - 15 make the sleeve that the second end will pass through to fasten the scarf.

Row 8a) Ch1, 5dc in back loop only (5)

Row 9a - 14a) Ch1, 5dc in both loops. Fasten off

Row 8b) Rejoin yarn in front loop only of row 7, ch1, 5dc in front loop only (5)

Row 9b - 14b) Ch1, 5dc in both loops

Row 15) Ch1, 5dc working into a stitch from both row 14a and 14b each time (5)

Row 16) Ch2, 2tr into each dc (10)

Rows 17 - 41 make the part of the scarf that goes around the neck and can be lengthened or shortened as necessary.

Row 17 - 41) Ch2, 10tr

Row 42) Ch2, 5tr dec (5)

Row 43 - 48) Ch1, 5dc (5)

Row 49) Ch1, 1dc in 1st st, 2dc in next 4st (9)

Row 50) Ch2, 2tr in first st 1 tr in next 7 st 2tr in last st (11)

Row 51) Ch2, tr dec in next 2 tr, 1 tr in next 7 tr, tr dec in last two tr (9)

Row 52) Ch2, tr dec in next 2 tr, 1 tr in next 5 tr, tr dec in last two tr (7)

Row 53) Ch2, tr dec in next 2 tr, 1 tr in next 3 tr, tr dec in last two tr (5)

Row 54) Ch2, tr dec in next 2 tr, 1 tr in next 1 tr, tr dec in last two tr (3)

Row 55) Ch2, 3tr cluster (1) Fasten off.


Happy hooking!
xx
Monday 14 December 2015

Crochet Converse Slippers

Fun to make and hopefully fun to wear, these reached their final owner yesterday via Secret Santa so I can show and tell on here...


The nitty gritty:
I mostly followed this pattern: Easy and Quick crochet shoes ‘Sport’ - Pattern 215 from here. Although I made up my own super-chunky sole rather then using the combination of yarns suggested. The yarns I used were: King Cole Comfort chunky in white, Stylecraft Life super-chunky in Cardinal and Charcoal.


xx

Sunday 6 December 2015

Quick and Easy Christmas Mitts with Clever Tricks

Big trouble asked me to make him some gloves. Which I did, because, as you know, I do as I am told. 


He wanted closed thumbs and flaps to cover his fingers.


I was quite please with my make-it-up-as-you-go-along chunky mittens so I tweaked the pattern to simplify them, and made some more which will be winging their way to little hands for Christmas. They are quick as a flash to make but have a couple of clever tricks that I am pretty pleased with. A good opportunity to add a stitch or two to your repertoire...

I made three sizes: ages 3-4, 5-6 and 9-10 because those are the sizes of the small people who's hands they will warm.


You will need:
Size 3-4 Chunky yarn in two colours and a 4mm hook.
Size 5-6 Chunky or super-chunky yarn in two colours and a 5mm hook.
Size 9-10 Super-chunky yarn in two colours and a 6mm hook. 

If you want to make some sized 7-8 I am guessing that super-chunky yarn and a 5.5mm hook would do the trick. The pattern is the same for all sizes. 

The pattern is written in English crochet terms.

I used: King Cole Comfort chunky in white, Stylecraft Life super-chunky in Cardinal and Charcoal and Stylecraft Life chunky in Teal.

Cuff:

The cuff is where the clever tricks lie. It is crocheted rib made flat and then sown into a ring.

I often find that the foundation chain lets down a project because it doesn't have the same stretch as the rest of a crocheted piece and then I discovered the stretchy foundation chain and it is a revelation! Actually it is a foundation chain and dc row all made at the same time.

***Clever Trick number 1: The stretchy foundation chain.***

Foundation chain and row 1: Make a slip knot and chain two.


Insert the hook into the second stitch from the hook (ie the loop part of the slip knot)


Yarn over hook (yoh), pull through 1 loop (two loops on hook), (this is the foundation chain part of the stitch) yoh, pull through 1 loop, yoh pull through two loops (this is the dc part of the stitch).


*Insert the hook into the foundation chain of the previous stitch,


yoh, pull through 1 loop, yoh, pull though 1 loop, yoh, pull through 2 loops.*
Repeat from * to * four more times until you have six stitches.


***Clever Trick number 2: Crochet rib.***

Ch1 and turn work.

Row 2: Insert the hook into the back loop only of the third stitch from the hook (this feels all wrong but stick with me). Make a dc (yoh, pull through 1 loop, yoh, pull through two loops).


dc into the back loop only of the next 4 stitches (5 stitches). To make the last stitch of the row, insert the hook into the back of the first stitch of the previous row, dc. (This is trickiest on this row but gets easier).


ch1, turn work.

Rows 3-22: Repeat row 2. Fasten off leaving a 30 cm tail.

You should be able to count 11 ridges.


Bend round to make a cuff and stitch the ends together using the tail. Weave in the other end. The point where the two ends join makes a 12th ridge.


Palm and fingers:

Round 1: Join your second colour into one edge of the cuff. ch 1 (counts as 1dc), 23 dc, join with a slst into 1ch. (24 stitches, two into each ridge/ditch)


Round 2-5: ch1, 23 htr, join with a slst into 1ch.

Round 6: 1ch, 8htr, 2ch, skip 6 htr, 9 htr, join with a slst into 1ch.

Round 7: 1ch, 9htr into htr of previous row, 2htr around 2 ch, 8htr into htr of previous row, join with slst into 1ch.

Round 8: 1ch, 19htr, join with slst into 1 ch. Fasten off.


Thumb:

Round 1: Join the yarn into corner stitch beside thumb opening, 1 ch,


 6htr in htr of previous round, 1htr in corner stitch, 2slst into join with fingers, slst into 1ch to join. (10 stitches)


Round 2 : 1ch, 7 htr into htr of previous round, 2 htr into 2 slst of previous round, slst into 1ch to join. Fasten off.

Edging: dc around edge of fingers and thumb. fasten off and weave in all the ends.


Happy hooking!

xx